
To visit the product on our site, click here. http://bit.ly/1bHUiLU
Step 1: Removing the Heat Shield
Let the engine cool down to a safe temperature before you start to work on the car. Having a little heat in the car isn’t a bad thing, you just don’t want to burn yourself! Once it’s at a safe temperature, remove the 7 bolts to the heat shielding surrounding the turbocharger. You’ll need a 10mm wrench and/or socket for these.
 |
 |
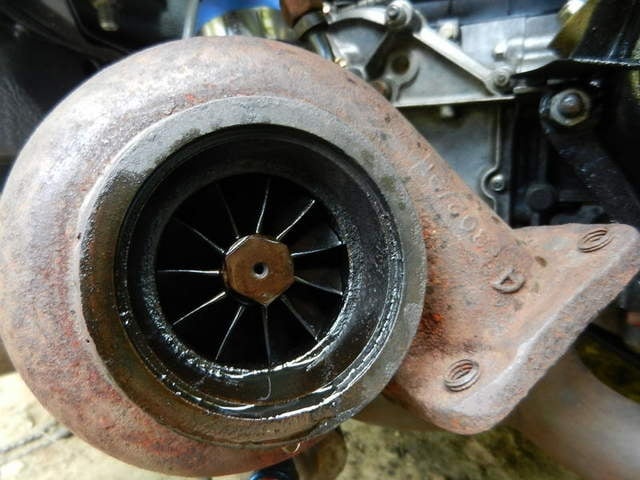
Step 2: Disconnecting the Downpipe from the Turbo
Loosen the nuts and bolts attaching the factory downpipe to the turbocharger with a 14mm wrench or socket. Some of them are bolts and some of them are studs. You’ll probably need a breaker bar or something with more leverage to break these loose. This can be very difficult depending on how old or new the car is or how tight the bolts are originally. Sometimes, the nuts have seized to the stud in which case you’ll have to cut them off or use other methods to get these out. You can use PB Blaster or an equivalent solution to make this easier. It can also be slightly easier for some if there is still some heat left in the exhaust from when the car was running.
 |
 |
Step 3: Unplugging the o2 Sensor
Unplug the o2 sensor connector so that you can disconnect the downpipe with the o2 sensor attached.

Step 4: Disconnect Mounting Hardware On Downpipe
Using a 14mm socket, remove the nut on the bracket attaching the downpipe to the transmission. Disconnect the secondary mounting bracket further downstream of the first mounting point.

Step 5: Loosen Mounting Hardware to Catback Exhaust
Loosen the two bolts attaching the downpipe to the catback section of the exhaust to the point where you can hang the exhaust on them but don’t fully remove them and disconnect the downpipe yet.

Step 6: Removing the Downpipe
Now, fully remove the 3 nuts from the studs and 2 bolts and nuts that connect the downpipe to the turbo. Go back underneath the car and while holding up the exhaust (a second person to help makes this easier), disconnect the bolts to the catback portion of the exhaust and remove the downpipe from the car. You’ll pull off the downpipe with the o2 sensor remaining in the pipe.
Step 7: Removing the o2 Sensor
Remove the o2 sensor with an o2 sensor socket and a breaker bar. Be careful with this as many times, the o2 sensor seizes to the pipe as well and if not taken out carefully, can cause you to need a completely new o2 sensor.

Step 8: Reinstall the New Invidia Downpipe
Using anti-seize lubricant around the threads of the o2 sensor, reinstall the factory o2 sensor in the new downpipe.
Repeat steps 1-6 in reverse order to install the new downpipe. When you are reinstalling the new downpipe, make sure you do not tighten ANY of the nuts or bolts 100% until the end. You will need to allow movement of the downpipe in order to fit all connections before you tighten them down. Also, make sure to use anti-seize lubricant on the studs and bolts when connecting the downpipe to the turbo. This will help allow you to take off the downpipe at a later time if necessary. Make sure to use any new gaskets that come with the kit. If you are using a factory catback, you’ll need to reuse the gasket on the car. You’ll also need to reuse the gasket on the turbo side.
Here are some pictures of the new downpipe being installed as well as the finished product in the engine bay!
 |
 |
 |
 |
 |
 |
We hope this helps you with your downpipe installation on your Subaru WRX! If you have any questions, please let us know!
To visit the product on our site, click here. http://bit.ly/1bHUiLU
HAVE QUESTIONS OR NEED TO GET A HOLD OF US? CALL, EMAIL, OR CHAT WITH US ONLINE!http://www.edgeautosport.com
PHONE: 303-268-2140
Topics:


.jpg)


